 Fig 12 |
Pegasus Mail for Windows On-Line Guide Part 3
4.1.1 Address reply to:
4.1.2 Original message
4.3 Extracting a Message into a File
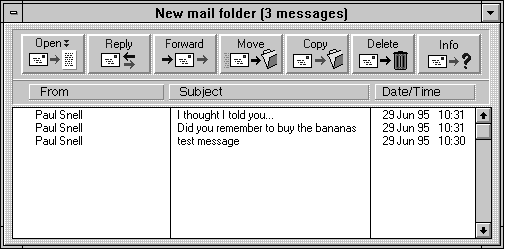
When you receive new mail it will arrive in the New Mail Folder. If you have closed this (as we did earlier) then re-open it by simply clicking on the Read New Mail button on the Button Panel.
Any new mail will appear in the large white expanse broken into three columns in the bottom half of the screen.
 Fig 12 |
Then to read a message, either:
(a) click on the line identifying the message to highlight (select) it and then click on the Open button;
or
(b) double-click on the line identifying the message.
This will open up the selected message. Occasionally you may have to move the message window around the screen to suit your needs. This is the same as moving any window in the Windows environment.
After reading the message you can click on the appropriate button to:
You can also move on to the next message by clicking on the Next + button (or on the Prev - button to go back to the previous message). Moving on to the next message leaves the original message in the New mail folder. The keyboard shortcut for these movements are to use the + (Plus) key and the - (Minus) key.
| While in the message window (with the text of the message visible) click on the Reply button at the top of the window. |
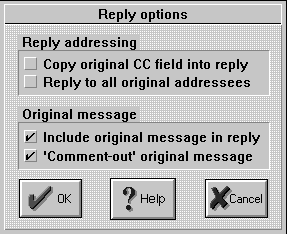
You will then be presented with the following dialog box:
 Fig 14 |
The options here are mostly self-evident. To select any option, simply click in the appropriate box to enter a tick mark for the features you want. Click on a tick mark if you want to de-select an option.
These options determine who gets copies of your reply.
These options determine if you want to include the original message in your message which you can then edit as required.
They allow you to 'comment out' the original; i.e. it inserts a symbol such as > at the beginning of every line of the original message so the recipient can distinguish between the original message text and your reply.
Once you click on the OK button you will find yourself in the Send message window you used earlier (Figure 7) and this operates in the usual manner. The only differences are that the To: field is already filled in for you, and the subject field will start with Re: followed by the original subject line, unless it already starts with Re:. If you elected to include the original message it is included automatically with each line being preceded by the > symbol.
If you think a message you receive is of interest to a colleague then rather than sending them an independent Email about the original, you can simply forward the original. This option is very useful, and also allows you to add your own comments to the original (or remove parts that you feel are not appropriate.)
| Click on the Forward button in the toolbar at the top of the window. You will be presented with the dialog box shown in Fig 16: |
 Fig 16 |
Again the options are easily understood. In the Forward to: field you enter the Email address of your colleague(s). If you wish to add your own comments before sending or edit out some of the original, then make sure the tick is present by the Edit message before forwarding option. Click on OK and away you go.
4.3 Extracting a Message into a File
If you want to extract the contents of a Pegasus Mail message and place it into a file on a disk, you click on Reader in the main Pegasus Mail menu bar, then select Extract message to file. A dialog box with the heading Save as will appear (Fig 17) and prompt you to enter a pathname for the new file (drive, directory and filename). When you have done this you click on the OK button. This creates a completely separate text file that can then be (for example) edited in your favourite word processor.
 Fig 17 |
Note that messages which contain 'attachments' (i.e. separate files which have been attached to the message) must be dealt with in a different way. See XXX of this guide for information on attachments.
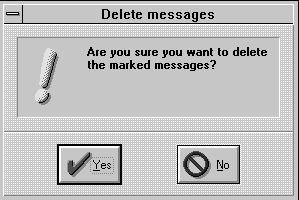
With the message open simply click on the Delete button. A small dialog box (xxx.) will check that you are sure that you wish to delete this message. Click on the Yes button and it is deleted.
 Fig 18 |
Note that to delete several messages at once you should do the following:
4.4.1 Retrieving Messages Deleted by Mistake
It is all too easy to delete accidentally a message. One way of trying to combat this is to tell Pegasus to preserve deleted messages until you switch it off. Pegasus will create a special folder called "Deleted Messages" and any deleted messages will be kept there until you switch it off. This means that if you have deleted a message by mistake you can go to that folder and move the message to another folder - it will then not be deleted. To switch this option on:
Produced and Written by Paul Snell.